Attendance & Scheduling
How can users request paid or unpaid leave
Regular users can request Paid / Unpaid leave in Work Schedules only if the option Allow users to apply for leaves is enabled in Company Settings.
Manage Leave Approvals
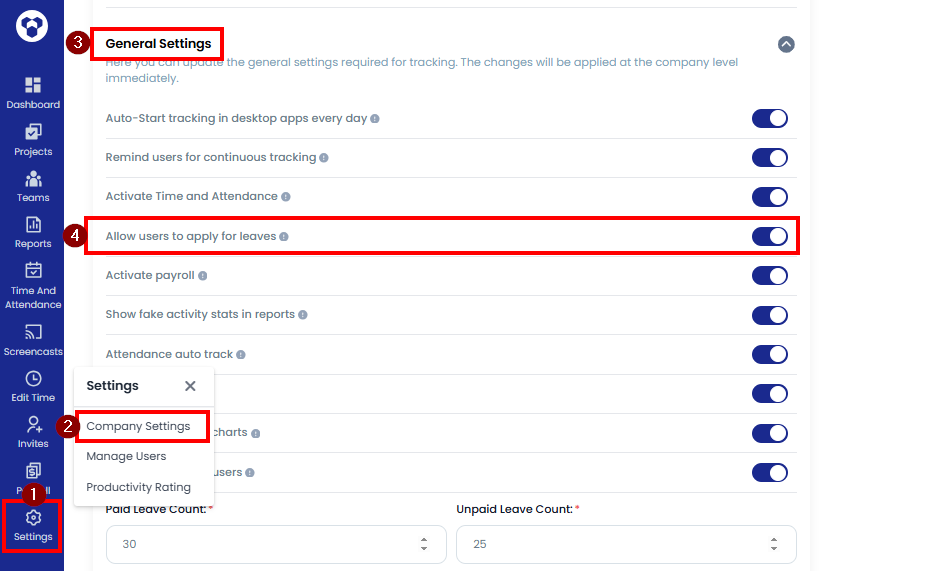
- Go to Settings → Company Settings → General Settings
- Enable Allow users to apply for leaves.
Request Paid Leave
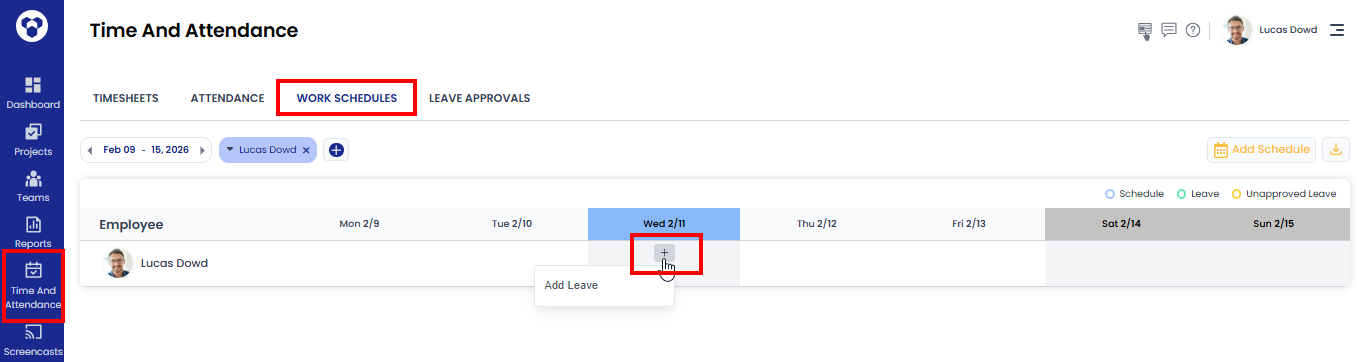
- Go to Time and Attendance → Work Schedules
- Choose the date you want to add leave for and click the plus (+) icon.
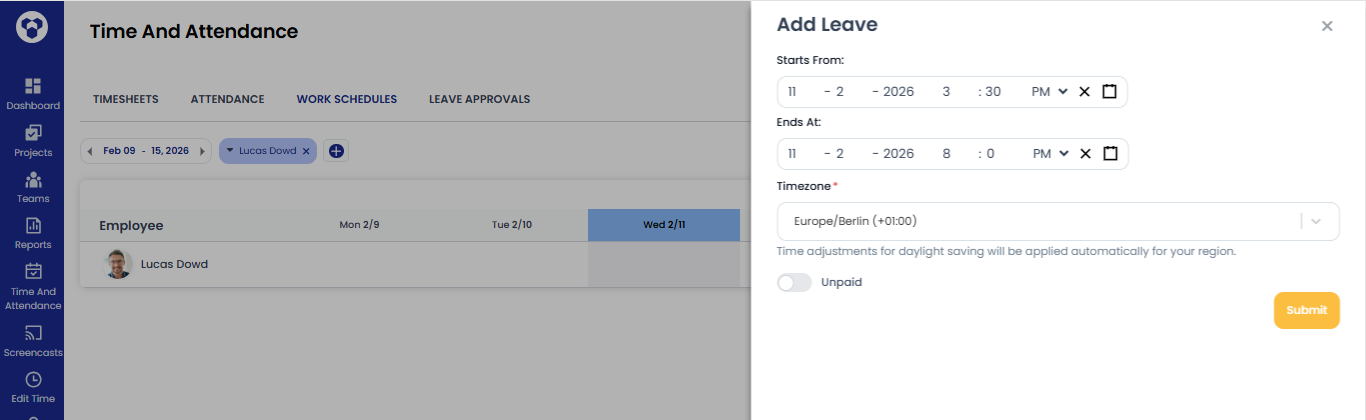
- Enter the time for your leave, and then click the Submit button.
- If a user has tracking data for a specific time, a leave request will not be created for that time, and a message will be shown to the user.
Note: After submitting, the leave request will go for approval and can be approved or declined by Owners, Admins, or Managers.
Request Unpaid Leave
- Go to Time and Attendance → Work Schedules
- Choose the date you want to add leave for and click the plus (+) icon.
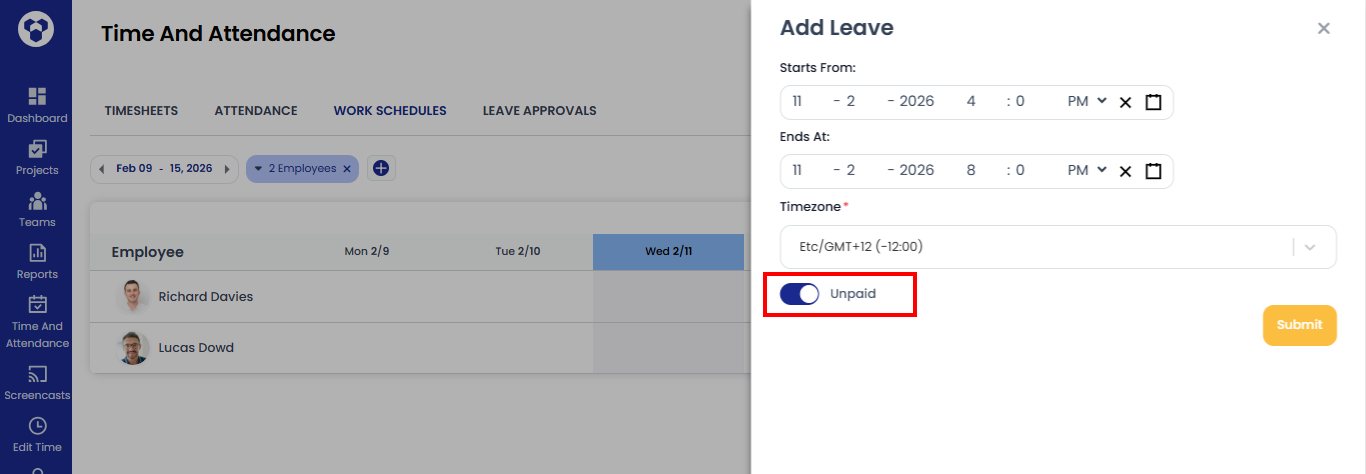
- Enter the time for your leave, enable the Unpaid toggle button, and then click the Submit button.
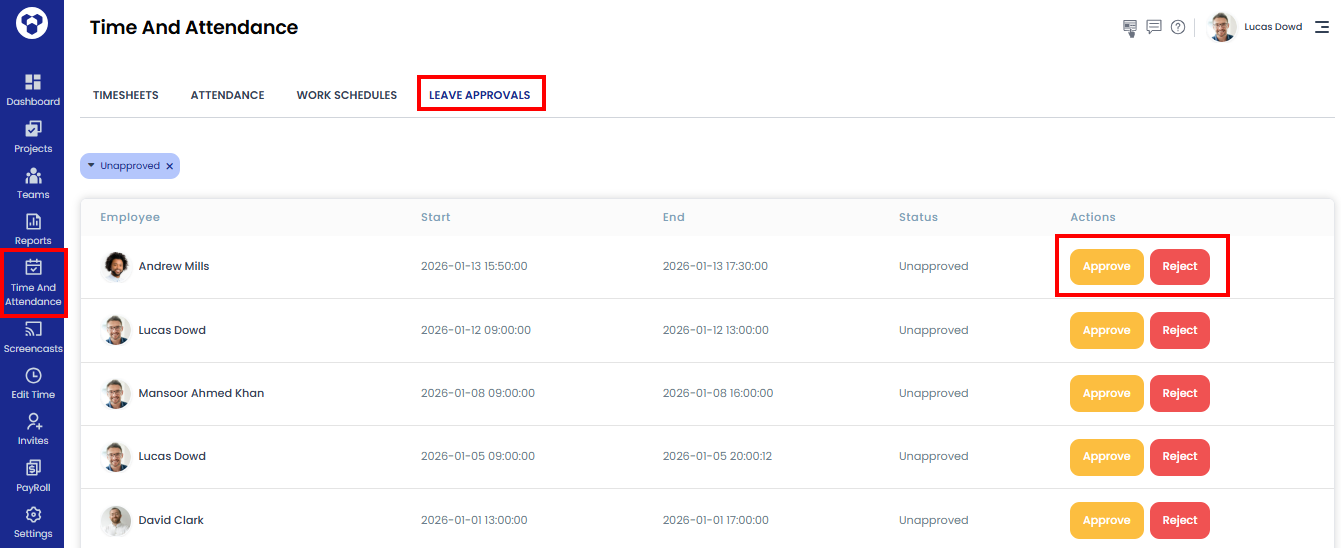
Approve paid / unpaid leave requests (Owners/Admins/Managers)
- Go to Time and Attendance → Leave Approval
- Click Approve or Reject as required.
- Once approved, the paid leave time is automatically added in Reports.
Note: Managers can approve leave requests only for the users they manage.
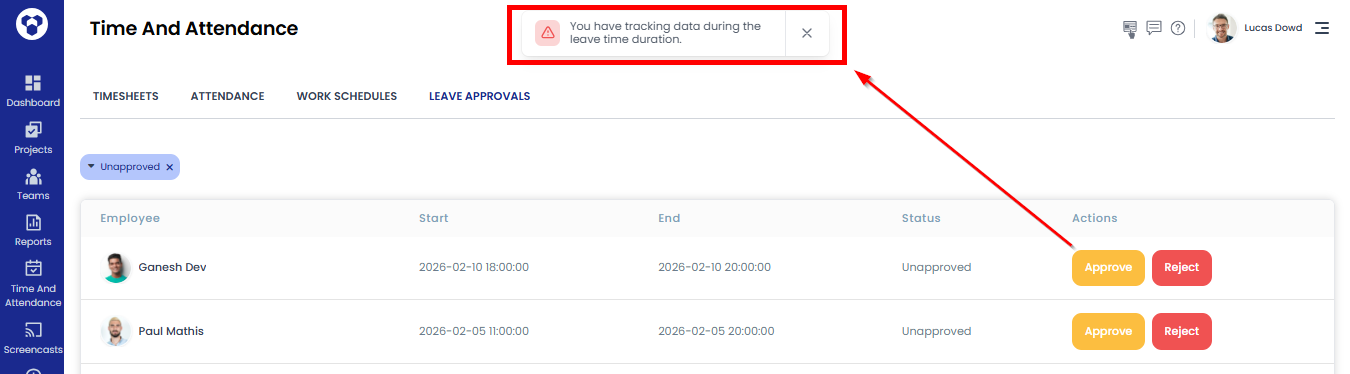
- If a user’s leave is already added but not approved, and the user has tracking data during the same leave time, a message will be shown to the admin/manager/owner when they try to approve the leave request.
Features of Paid Leave:
- Paid leave hours are included in total tracked time.
- Attendance shows the status as on Leave.

- Users on leave are not marked as absent.
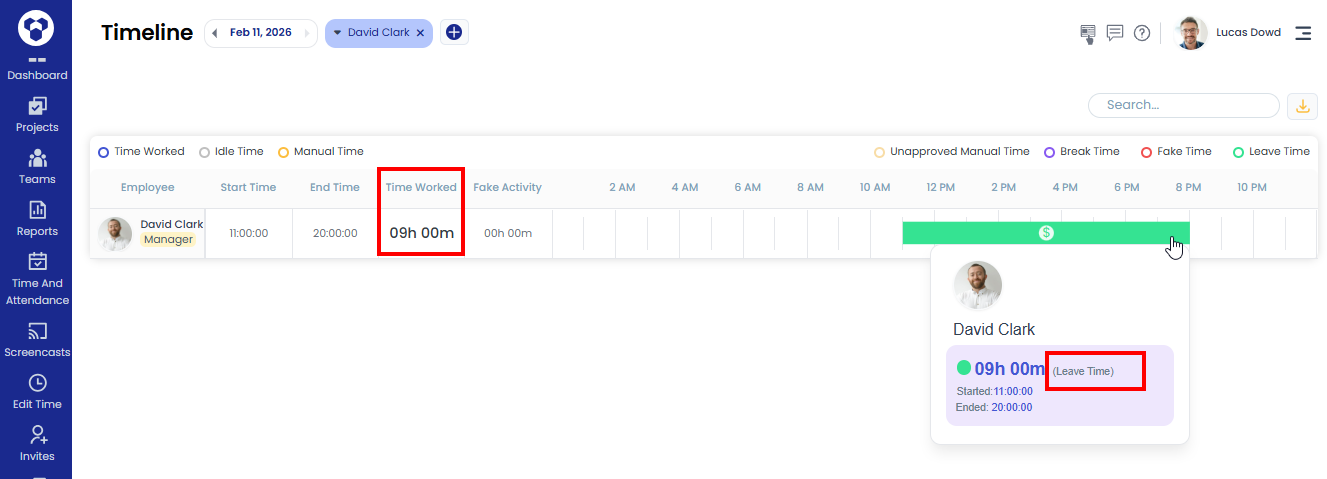
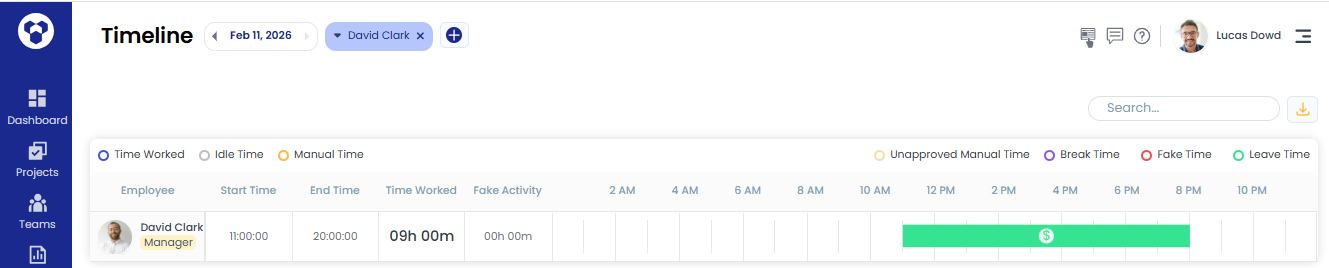
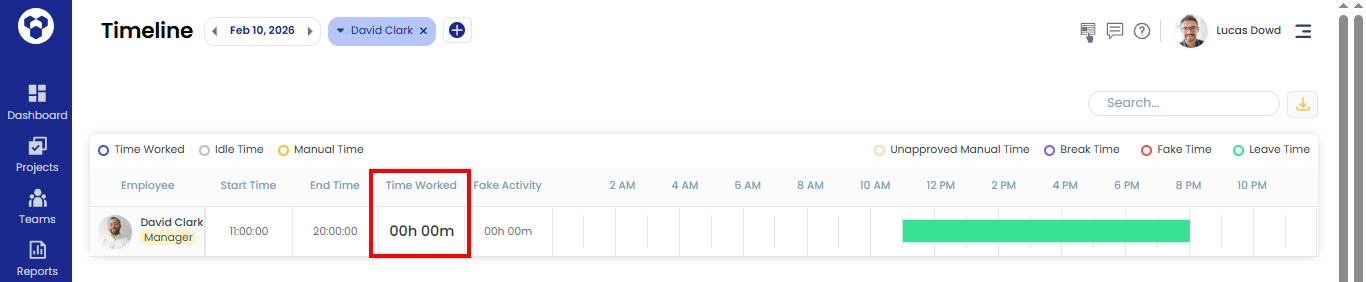
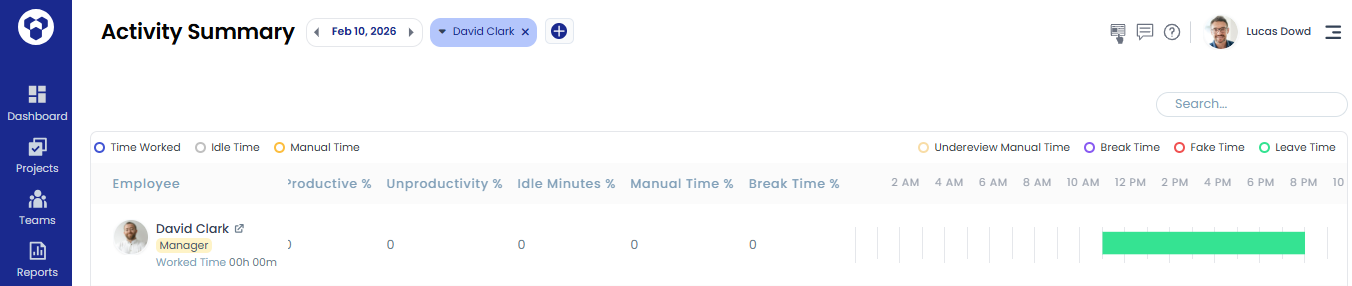
- In reports like Activity Summary and Timeline, leave time will be shown in green with a dollar sign.
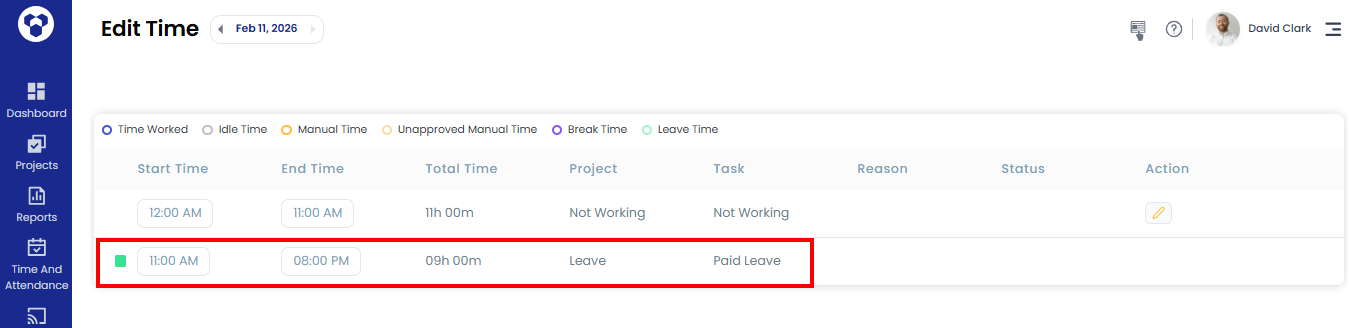
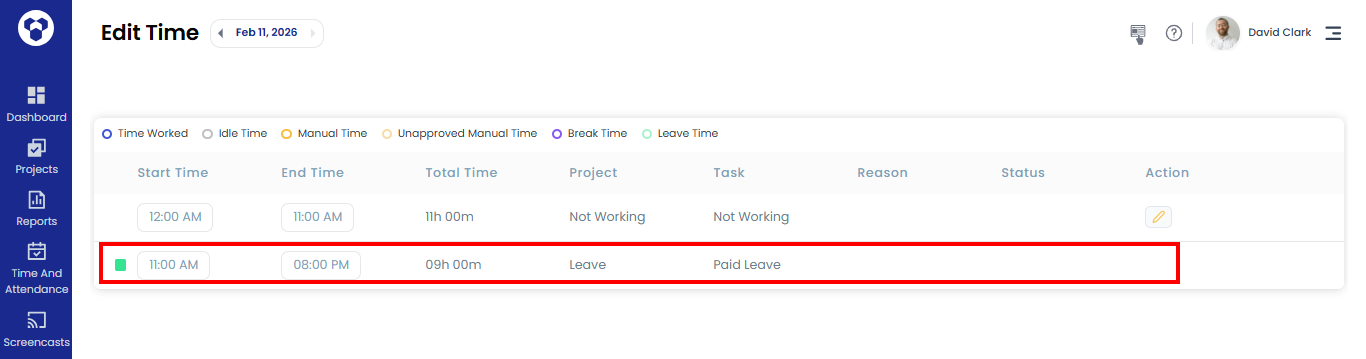
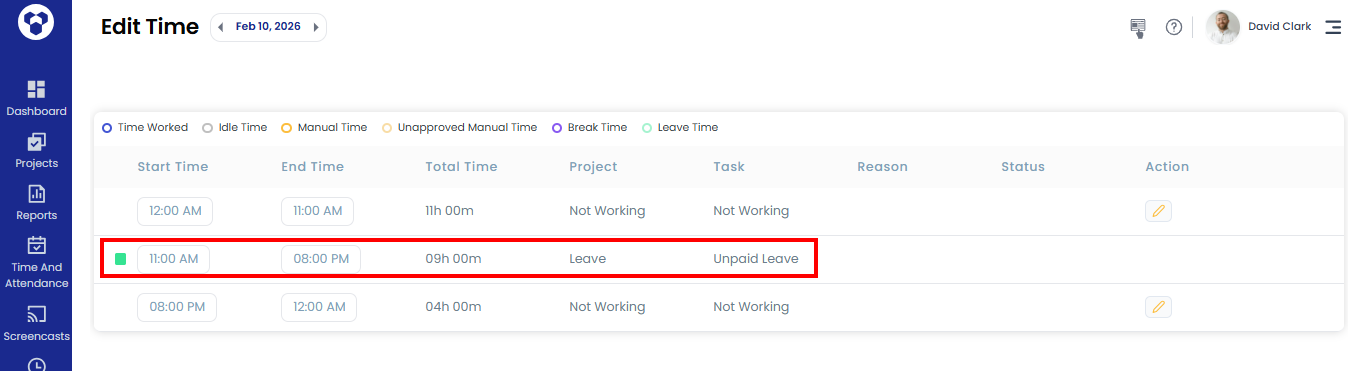
- Leave appears in Edit Time as a read only entry.
- If a user tracks time during the approved paid leave period, that time will be rejected.
- Paid leave time cannot be edited from the Edit Time page.
Features of Unpaid Leave:
- Unpaid leave time will not be added to reports.
- Attendance shows the status as on Leave.
- Users on leave are not marked as absent.
- In reports like Activity Summary and Timeline, leave time will be shown in green.
- Leave appears in Edit Time as a read only entry.
- If a user tracks time during the approved unpaid leave period, that time will be rejected.
- Unpaid leave time cannot be edited from the Edit Time page.
Paid / Unpaid Leave Calculation:
When a user adds a leave for part of the day (e.g., 4 hours), TraqNext considers it as a half-day leave and includes it in attendance and paid leave calculations accordingly.
A leave of 8 hours will be considered a full-day leave.
Example: If your current paid leave count is 5 and you take a half-day (4 hours) leave, it will be counted as 0.5 day, and your total paid leave will update from 5 to 5.5 days.
Note: If a user already has a half-day leave, they can still create a shift for the remaining hours of the same day.
Paid / Unpaid Leave Count:
When a paid / unpaid leave request is approved by an Owner, Admin, or Manager, its status is updated and it is added to the Total leave count on the dashboard.
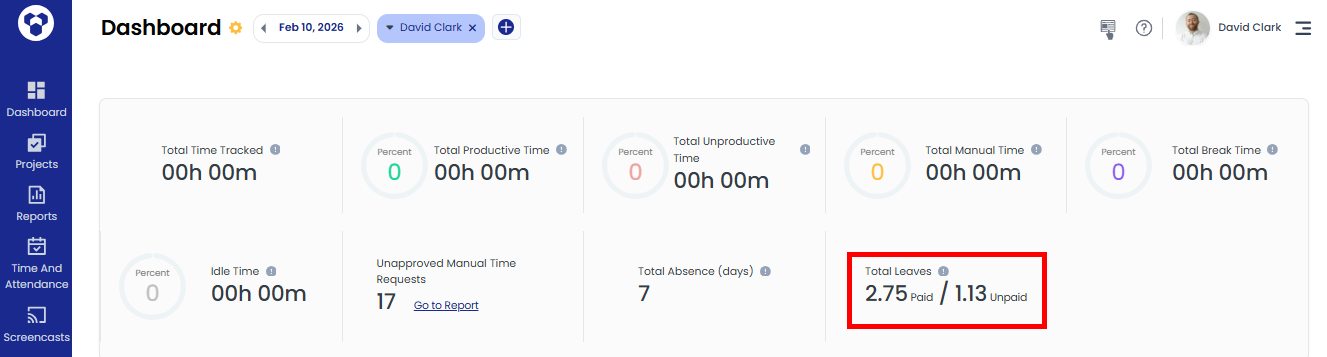
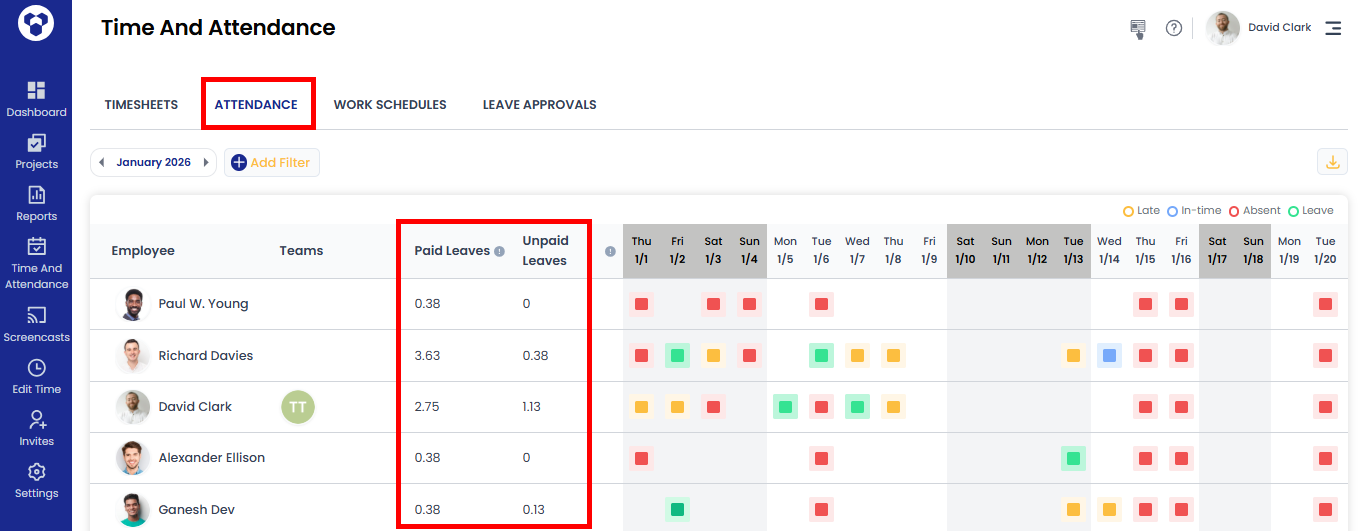
You can also check each user’s paid and unpaid leave count on the attendance page.
Approved / Unapproved Leave
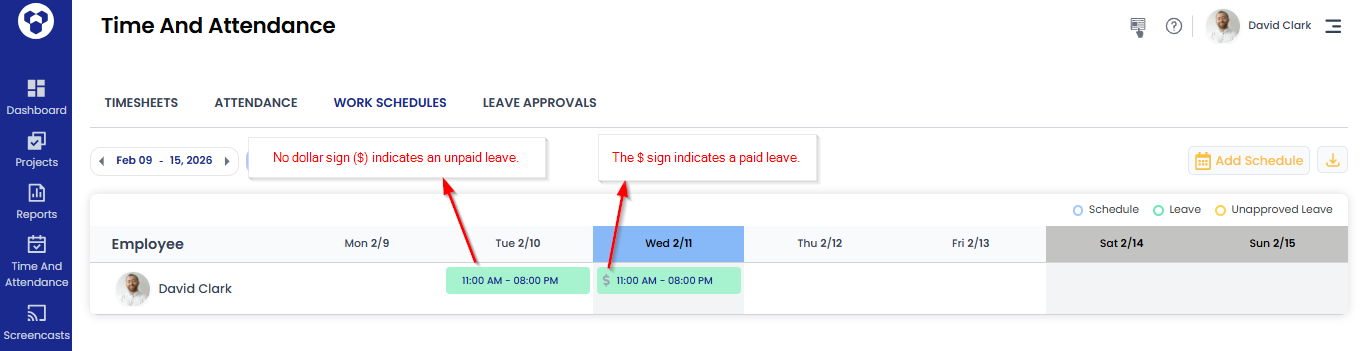
On the Work Schedules page:
- The $ sign indicates a Paid leave.
- No dollar sign ($) indicates an Unpaid leave.
Leave Request Limits
Users can submit Paid and Unpaid leave requests only up to the limits set in the company settings.
If the Set leave limits for users option is disabled, the user can submit unlimited paid or unpaid leave requests.

If a user reaches the leave limit while adding a leave, a message will be shown when they try to submit the leave request.
